fsck is a Unix utility for checking and repairing file system inconsistencies . File system can become inconsistent due to several reasons and the most common is abnormal shutdown due to hardware failure , power failure or switching off the system without proper shutdown. Due to these reasons the superblock in a file system is not updated and has mismatched information relating to system data blocks, free blocks and inodes .
fsck – Modes of operation :
fsck operates in two modes interactive and non interactive :
Interactive – fsck examines the file system and stops at each error it finds in the file system and gives the problem description and ask for user response whether to correct the problem or continue without making any change to the file system.
Non interactive :fsck tries to repair all the problems it finds in a file system without stopping for user response useful in case of a large number of inconsistencies in a file system but has the disadvantage of removing some useful files which are detected to be corrupt .
If file system is found to have problem at the booting time non interactive fsck is run and all errors which are considered safe to correct are corrected. But if still file system has problems the system boots in single user mode asking for user to manually run the fsck to correct the problems in file system
Running fsck :
fsck should always be run in a single user mode which ensures proper repair of file system . If it is run in a busy system where the file system is changing constantly fsck may see the changes as inconsistencies and may corrupt the file system .
If the system can not be brought in a single user mode fsck should be run on the partitions ,other than root & usr , after unmounting them . Root & usr partitions can not be unmounted . If the system fails to come up due to root/usr files system corruption the system can be booted with CD and root/usr partitions can be repaired using fsck.
command syntax
fsck [ -F fstype] [-V] [-yY] [-o options] special
-F fstype type of file system to be repaired ( ufs , vxfs etc)
-V verify the command line syntax but do not run the command
-y or -Y Run the command in non interactive mode – repair all errors encountered without waiting for user response.
-o options Three options can be specified with -o flag
b=n where n is the number of next super block if primary super block is corrupted in a file system .
p option used to make safe repair options during the booting process.
f force the file system check regardless of its clean flag.
special – Block or character device name of the file system to be checked/repaired – for example /dev/rdsk/c0t3d0s4 .Character device should be used for consistencies check & repair
fsck phases
fsck checks the file system in a series of 5 pages and checks a specific functionality of file system in each phase.
** phase 1 – Check Blocks and Sizes
** phase 2 – Check Pathnames
** phase 3 – Check Connectivity
** phase 4 – Check Reference Counts
** phase 5 – Check Cylinder Groups
fsck error messages & Corrective action :
1. Corrupted superblock – fsck fails to run
If the superblock is corrupted the file system still can be repaired using alternate superblock which are formed while making new file system .
the first alternate superblock number is 32 and others superblock numbers can be found using the following command :
newfs -N /dev/rdsk/c0t0d0s6
for example to run fsck using first alternate superblock following command is used
fsck -F ufs -o b=32 /dev/rdsk/c0t0d0s6
2. Link counter adjustment
fsck finds mismatch between directory inode link counts and actual directory links and prompts for adjustment in case of interactive operation. Link count adjustments are considered to be a safe operation in a file system and should be repaired by giving ‘y’ response to the adjust ? prompt during fsck.
3. Free Block count salvage
During fsck the number of free blocks listed in a superblock and actual unallocated free blocks count does not match. fsck inform this mismatch and asks to salvage free block count to synchronize the superblock count. This error can be corrected without any potential problem to the file system or files.
4. Unreferenced file reconnection
While checking connectivity fsck finds some inodes which are allocated but not referenced – not attached to any directory . Answering y to reconnect message by fsck links these files to the lost+found directory with their inode number as their name .
To get more info about the files in lost+found ‘file’ command can be used to see the type of files and subsequently they can be opened in their applications or text editors to find out about their contents. If the file is found to be correct it can be used after copying to some other directory and renaming it.
Tuesday, January 11, 2011


Securing Solaris
your system from internal & external security vulnerabilities
Introduction
Solaris security broadly falls under two groups – one is where the system is accessible using local area network/vlan and it has to be secured against unauthorized access. Second is system is accessible over the Internet to a number of persons and it has to be protected against unauthorized access using network or security loopholes.
This document details some of the focus areas for security and provides suggestions to make it strong.
Following topics are covered in this article for securing Solaris .
1. Latest patches
2. Access to the system.
3. Run level and network services
4. ip module
5. System file , /etc/system
6. sadmind daemon
7. root kit & srload hack
1. Latest patches
Any operating system might have security bugs, which are detected only when system is used in a real time environment. Apply whatever patches are available as of to date to plug the already discovered security loopholes and look for the information about new security related bugs.
Generally it takes some time when security loophole is discovered and its patch is developed . So the best strategy against such situations is to keep informed by reading security related bulletin of the OS vendor and disabling the affected service or constantly monitoring it and applying patches whenever its available .
A perl script – patchk – is available at sunsolve.sun.com which can be used to identify & compare the existing patches and download the latest ones.
2. Access to the system
Limit Root Access
Limit the direct root access by making sure console entry in /etc/default/login is not commented out .
If secure shell is being used to access the systems edit sshd.config and ssh.config to disable root access
sshd.config
Permit root login no
Permit empty password no
Allow hosts
Allow users
ssh.config
Forward x11 no
Password authentication no
Host based authentication is more secure as it is based on private keys and public keys and only user with the keys are allowed to connect . Password authentication is less secure as they can be guessed or cracked by some programs .
Limit su capabilities
Allow only a few selected members of a group to use su to prevent any unauthorized access by guessing the root password . Create a system administrator’s group and change su owner to root and group to administrator’s group . Change su permissions to allow only member of this group an execute permission .
Remote Access files
.rhosts ,.netrc hosts.equivalent are the files that provides access to the remote systems and should be monitored carefully .They should be checked regularly for any unauthorized entry or if not needed can be made with zero permission – chmod 0 . This will not allow creation of new file by the same name and put entries to gain access.
Keep access log
sulog file gives information about su login attempts to the system similarly a loginlog file can be created by touching /etc/loginlog which keeps all the login information . Besides last command also give useful information about the persons accessing the system.
3. Run level and network services
Stop unnecessary services at run levels:
/etc/rc2.d and /etc/rc3.d directories have scripts starting at the booting time or when run level is changed . By default a number of services are started out of which only a few might be required . In most of the cases , particularly in production environment certain services are not required at all but provides various ports for gaining entry to the system
Evaluate your system requirements and look at the rc scripts , disable the files that are not required by making letter capital in the beginning as ‘s’ . System requirements may vary from system to system but you should check if you don’t need following services & can disable them.
Enabled Disabled
S71ldap.client S72autoinstall
S72slpd S88sendmail S72nfs.client S74autofs S99dtlogin S15nfs.server s71ldap.client s72autoinstall
s72slpd s88sendmail s73nfs.client s1574autofs s99dtlogin s15nfs.server
Stop unnecessary and insecure network services
/etc/inetd.conf has entry for about fifty network services and most of them are started by default . While some of these services are not secure -telnet,ftp ,some of it are not required at all . These services can allow a intruder to get in by providing system information and ports.
Services such as finger ,sysstat & netstat provide useful information about the users , system and network. Depending on the applications requirement some of these services should be stopped by commenting out corresponding entry in /etc/inetd.conf
ftp should be disabled and secure copy ,scp ,sftp should be used instead . But if you must use ftp then limit the users which can do a ftp to the system . /etc/ftpusers file can be created to keep the ftp user list .
4. ip module
Control the IP Behavior :
IP module can be tuned to prevent forwarding , redirecting of packets and request for information from the system . These parameters can be set using ndd with the given value to limit these features .
#ndd -set /dev/ip ip_forward_directed_broadcasts 0
#ndd -set /dev/ip ip_forward_src_routed 0
#ndd -set /dev/ip ip_ignore_redirect 1
#ndd -set /dev/ip ip_ire_flush_interval 60000
#ndd -set /dev/ip ip_ire_arp_interval 60000
#ndd -set /dev/ip ip_respond_to_echo_broadcast 0
#ndd -set /dev/ip ip_respond_to_timestamp 0
#ndd -set /dev/ip ip_respond_to_timestamp_broadcast 0
#ndd -set /dev/ip ip_send_redirects 0
To see a list of all parameter for a particular driver
#ndd /dev/ip
name to get/set ? ?
To get value of a particular parameter :
#ndd -get /dev/ip ip_respond_to_timestamp_broadcast
5. System file , /etc/system
Add the following lines to /etc/system file to prevent the buffer overflow in a possible attack to execute some malicious code on your machine.
set noexec_user_stack=1
set noexec_user_stack_log=1
Depending upon the requirement all or a combination of all the above suggestions can be implemented . Certain application software, web servers etc have there own parameters for securing access and data . So besides solaris those parameters may have to be taken in consideration in addition to solaris parameters to secure system completely.
6. sadmind daemon vulnerability
The sadmind daemon is used for distributed system administration operations in the Solstice AdminSuite applications. In its default configuration sadmind uses a set of clear text Remote Procedure Calls (RPC) to authenticate between two machines. An attacker can construct RPC packets that allow them r to forge a valid client identity and get it validated . Once the sadmind client has authenticated, the hacker can perform any command on the remote system even with root privileges .
Protecting against sadmind vulnerability
sadmind is controlled through the file /etc/inetd.conf as per the following entry :
100232/10 tli rpc/udp wait root /usr/sbin/sadmind sadmind
In this configuration, sadmind uses cleartext hostnames and authentication credentials as the security level is default no security level .
There are two ways to deal with this situation :
1. Completely disable the sadmind in the inted.conf if not required by commenting out the sadmind line or removing it altogather .
#100232/10 tli rpc/udp wait root /usr/sbin/sadmind sadmind
Restart inetd:
# /usr/bin/pkill -HUP inetd
2. Increase the level of security by requiring DES encryption for your authentication mechanism by adding the ‘-S 2′ flag to the end of the sadmind line in inetd.conf:
100232/10 tli rpc/udp wait root /usr/sbin/sadmind sadmind -S 2
Restart inetd:
# /usr/bin/pkill -HUP inetd
7. Root Kit
The hackers in some cases installs a “root” kit which changes various files in the system in order to gain super user privileges and to conceal the compromise.
You can determine with pkgchk command if certain files have changed :
/bin/su
/usr/sbin/ping
/usr/bin/du
/usr/bin/passwd
/usr/bin/find
/bin/ls
/bin/netstat
/usr/bin/strings
If there is any error reported on any of these files then system is compromised . The best resort in these cases is to take system off the network and do a fresh operating system installation .
srload :
srload is a part of root kit which is used to get the non-standard SSH port access by the attackers . Compromised systems have a entry in /etc/inittab of following line
SV:23:respawn:/usr/bin/srload -D -q
and may have the following file modified along with other files :
/etc/rcS.d/S30rootusr.sh
The immediate action for this is to disable the srload command by removing it from /etc/inittab after booting in single user mode and removing srload command binary from /usr/bin or any other location .
Introduction
Solaris security broadly falls under two groups – one is where the system is accessible using local area network/vlan and it has to be secured against unauthorized access. Second is system is accessible over the Internet to a number of persons and it has to be protected against unauthorized access using network or security loopholes.
This document details some of the focus areas for security and provides suggestions to make it strong.
Following topics are covered in this article for securing Solaris .
1. Latest patches
2. Access to the system.
3. Run level and network services
4. ip module
5. System file , /etc/system
6. sadmind daemon
7. root kit & srload hack
1. Latest patches
Any operating system might have security bugs, which are detected only when system is used in a real time environment. Apply whatever patches are available as of to date to plug the already discovered security loopholes and look for the information about new security related bugs.
Generally it takes some time when security loophole is discovered and its patch is developed . So the best strategy against such situations is to keep informed by reading security related bulletin of the OS vendor and disabling the affected service or constantly monitoring it and applying patches whenever its available .
A perl script – patchk – is available at sunsolve.sun.com which can be used to identify & compare the existing patches and download the latest ones.
2. Access to the system
Limit Root Access
Limit the direct root access by making sure console entry in /etc/default/login is not commented out .
If secure shell is being used to access the systems edit sshd.config and ssh.config to disable root access
sshd.config
Permit root login no
Permit empty password no
Allow hosts
Allow users
ssh.config
Forward x11 no
Password authentication no
Host based authentication is more secure as it is based on private keys and public keys and only user with the keys are allowed to connect . Password authentication is less secure as they can be guessed or cracked by some programs .
Limit su capabilities
Allow only a few selected members of a group to use su to prevent any unauthorized access by guessing the root password . Create a system administrator’s group and change su owner to root and group to administrator’s group . Change su permissions to allow only member of this group an execute permission .
Remote Access files
.rhosts ,.netrc hosts.equivalent are the files that provides access to the remote systems and should be monitored carefully .They should be checked regularly for any unauthorized entry or if not needed can be made with zero permission – chmod 0 . This will not allow creation of new file by the same name and put entries to gain access.
Keep access log
sulog file gives information about su login attempts to the system similarly a loginlog file can be created by touching /etc/loginlog which keeps all the login information . Besides last command also give useful information about the persons accessing the system.
3. Run level and network services
Stop unnecessary services at run levels:
/etc/rc2.d and /etc/rc3.d directories have scripts starting at the booting time or when run level is changed . By default a number of services are started out of which only a few might be required . In most of the cases , particularly in production environment certain services are not required at all but provides various ports for gaining entry to the system
Evaluate your system requirements and look at the rc scripts , disable the files that are not required by making letter capital in the beginning as ‘s’ . System requirements may vary from system to system but you should check if you don’t need following services & can disable them.
Enabled Disabled
S71ldap.client S72autoinstall
S72slpd S88sendmail S72nfs.client S74autofs S99dtlogin S15nfs.server s71ldap.client s72autoinstall
s72slpd s88sendmail s73nfs.client s1574autofs s99dtlogin s15nfs.server
Stop unnecessary and insecure network services
/etc/inetd.conf has entry for about fifty network services and most of them are started by default . While some of these services are not secure -telnet,ftp ,some of it are not required at all . These services can allow a intruder to get in by providing system information and ports.
Services such as finger ,sysstat & netstat provide useful information about the users , system and network. Depending on the applications requirement some of these services should be stopped by commenting out corresponding entry in /etc/inetd.conf
ftp should be disabled and secure copy ,scp ,sftp should be used instead . But if you must use ftp then limit the users which can do a ftp to the system . /etc/ftpusers file can be created to keep the ftp user list .
4. ip module
Control the IP Behavior :
IP module can be tuned to prevent forwarding , redirecting of packets and request for information from the system . These parameters can be set using ndd with the given value to limit these features .
#ndd -set /dev/ip ip_forward_directed_broadcasts 0
#ndd -set /dev/ip ip_forward_src_routed 0
#ndd -set /dev/ip ip_ignore_redirect 1
#ndd -set /dev/ip ip_ire_flush_interval 60000
#ndd -set /dev/ip ip_ire_arp_interval 60000
#ndd -set /dev/ip ip_respond_to_echo_broadcast 0
#ndd -set /dev/ip ip_respond_to_timestamp 0
#ndd -set /dev/ip ip_respond_to_timestamp_broadcast 0
#ndd -set /dev/ip ip_send_redirects 0
To see a list of all parameter for a particular driver
#ndd /dev/ip
name to get/set ? ?
To get value of a particular parameter :
#ndd -get /dev/ip ip_respond_to_timestamp_broadcast
5. System file , /etc/system
Add the following lines to /etc/system file to prevent the buffer overflow in a possible attack to execute some malicious code on your machine.
set noexec_user_stack=1
set noexec_user_stack_log=1
Depending upon the requirement all or a combination of all the above suggestions can be implemented . Certain application software, web servers etc have there own parameters for securing access and data . So besides solaris those parameters may have to be taken in consideration in addition to solaris parameters to secure system completely.
6. sadmind daemon vulnerability
The sadmind daemon is used for distributed system administration operations in the Solstice AdminSuite applications. In its default configuration sadmind uses a set of clear text Remote Procedure Calls (RPC) to authenticate between two machines. An attacker can construct RPC packets that allow them r to forge a valid client identity and get it validated . Once the sadmind client has authenticated, the hacker can perform any command on the remote system even with root privileges .
Protecting against sadmind vulnerability
sadmind is controlled through the file /etc/inetd.conf as per the following entry :
100232/10 tli rpc/udp wait root /usr/sbin/sadmind sadmind
In this configuration, sadmind uses cleartext hostnames and authentication credentials as the security level is default no security level .
There are two ways to deal with this situation :
1. Completely disable the sadmind in the inted.conf if not required by commenting out the sadmind line or removing it altogather .
#100232/10 tli rpc/udp wait root /usr/sbin/sadmind sadmind
Restart inetd:
# /usr/bin/pkill -HUP inetd
2. Increase the level of security by requiring DES encryption for your authentication mechanism by adding the ‘-S 2′ flag to the end of the sadmind line in inetd.conf:
100232/10 tli rpc/udp wait root /usr/sbin/sadmind sadmind -S 2
Restart inetd:
# /usr/bin/pkill -HUP inetd
7. Root Kit
The hackers in some cases installs a “root” kit which changes various files in the system in order to gain super user privileges and to conceal the compromise.
You can determine with pkgchk command if certain files have changed :
/bin/su
/usr/sbin/ping
/usr/bin/du
/usr/bin/passwd
/usr/bin/find
/bin/ls
/bin/netstat
/usr/bin/strings
If there is any error reported on any of these files then system is compromised . The best resort in these cases is to take system off the network and do a fresh operating system installation .
srload :
srload is a part of root kit which is used to get the non-standard SSH port access by the attackers . Compromised systems have a entry in /etc/inittab of following line
SV:23:respawn:/usr/bin/srload -D -q
and may have the following file modified along with other files :
/etc/rcS.d/S30rootusr.sh
The immediate action for this is to disable the srload command by removing it from /etc/inittab after booting in single user mode and removing srload command binary from /usr/bin or any other location .
Solaris Installation
Solaris installation poses a challenges to the new Solaris sysadmins who have never done the installation of Solaris before . Though the installation itself is simple and straight forward but doing it the first time comes with its own anxiety associated with unexplored and unknown things .
The idea of this article is to introduce you with the procedure and sequence of event Solaris installation to build enough confidence to finish the installation on your own.
Table of contents
1. Before you begin
2. Getting Started
3. Starting the installation
4. OS distributions & disk configuration
5. After Installation
6. Next Steps
1. Before you begin
For Solaris installation on standalone Sun machine you need the following besides sun cpu :
A) Sun Monitor and Sun Keyboard
OR
For carrying the installation through the serial port A of Sun (ttya)
Dumb Terminal or PC with serial port communication software like HyperTerminal
AND
A null modem cable ( Pin 2 & 3 crossed 5 common ground in 9 Pin to 9 pin ; Pin 7 is common ground in 25 Pin connector ) connecting sun’s serial port A with PC serial port.
B) You will also require a IP address, netmask and a host name for your system.
2. Getting Started
Installation starts at OK> prompt & you can get to ok> using any of the following method :
A. by pressing Stop A key sequence on a Sun Keyboard.
B. typing #init 0 if your system boots up directly .
C. Pressing ctrl-break or shift-break on a pc keyboard if using pc as
console through serial port.
D. If auto-boot feature is enabled system directly boots up
and gives you a # prompt .You can disable auto-boot so next time it
stays at ok prompt for starting installation.
#/usr/platform/sun4u/bin/eeprom auto-boot?=false
reboot the system.
3. Starting the installation
Insert the installation media – OS CD in CD drive and type boot cdrom at ok> prompt .
Ok>boot cdrom
The first phase begins with system identification and gathers information about the system from the the user .System starts booting up and after initialization it asks for language and locale also terminal type in case of PC/terminal
Select your locale and DEC VT100 terminal type for terminal selection
Further installation through the terminal require response to the
selections through ESC and function keys and space bar which are
mentioned on the installation screen.
On the next screens, you are to identify the system as networked or non-networked, and set the default time zone and date/time. After this following host information is required :
A) A host name for the system
B) Whether the system is networked if yes you will have to
provide the IP address & netmask of this machine.
Next you will be asked to select the name services
Name services
[ ] NIS+
[ ] NIS
[ ] DNS
[X ] None
Select the service if you have complete details like domain names etc or select none to configure after installation.
You have to select a distribution type from among the choices choices
4. OS distribution & Disk configuration
After identification is complete the installation process proceeds on to the OS and disk configuration and need your input for these settings. Selection depends on role of your machine
Typical space requirement for Solaris 7 is given here.
[ ] Entire Distribution plus OEM support 64-bit 1242.00 MB (F4 to Customize
[X] Entire Distribution 64-bit .....…...….1215.00 MB
[ ] Developer System Support 64-bit.... 1154.00 MB
[ ] End User System Support 64-bit .….. 765.00 MB
[ ] Core System Support .............. .334.00 MB
* Entire distribution with OEM has all software with some third party software
* Entire distribution has all software without third party software .
* Developer system has run time libraries for C software etc.
* End user has X windows and CDE environment .
* Core system is without X windows softwares etc.
If you are not sure select entire distribution.
You will be presented with choice to select the boot disk among the disks present in the system ,unless you have reasons select the c0t0d0 at boot disk.
[ X ] c0t0d0 (17269 MB) boot disk 17269 MB
[ ] c0t1d0 (17269 MB) 17269 MB
overlap partition represents entire disk and is slice s2 of the disk.
If any of the disk contain a preexisting partition you will be given a choice to preserve the partition .
Next the current layout is given ( if existing ) and you are asked to select between Automatic and Custom layout of disk partitions.
* Automatic layout make a single partition of entire boot disk .
* Customize option gives and option to create the partitions and select the sizes .
Things to keep in mind while doing interactive or custom installation
- Additional space is required in /var & /home if server is to handle mail and printing as mail and print files are formed in /var & if the user home directories are to be located on /home partition
A sample partition table may look like following .
File system/Mount point Disk/Slice Size
---------------------------------------
/ c0t0d0s0 300 MB
swap c0t0d0s1 2000 MB
overlap c0t0d0s2 17269 MB
/usr c0t0d0s3 2000 MB
/opt c0t0d0s4 1000 MB
/var c0t0d0s5 1000 MB
- The swap partition size depends on the size of RAM in the system if you are not sure of its size keep it double the RAM or more than RAM in the system.
- If you are not sure of individual partition sizes of / , /usr /opt & /var make one partition as / and keep its size sufficiently higher than the distribution size you have selected in earlier steps . Always keep in mind the future software that you might have to install like compilers applications etc and log files that will be generated and accumulate in /var directory or partition.
After you have specified the partition sizes it gives summary and error if any
Installation Option: Initial
Boot Device: c0t0d0s0
Client Services: None
Software: Solaris 2.7, Entire Distribution
File System and Disk Layout:
/ c0t0d0s0 300 MB
swap c0t0d0s1 2000 MB
/usr c0t0d0s3 2000 MB
/opt c0t0d0s4 1000 MB
/var c0t0d0s5 1000 MB
one more question is asked about rebooting
[X] Auto Reboot
[ ] Manual Reboot
Afterwards it starts configuring disk making partitions and installing software indicating the progress in a table .
MBytes Installed: 700.66
MBytes Remaining: 0.00
Installing:
| | | | | |
0 20 40 60 80 100
After the installation is complete it customizes system files , devices ,logs , installs patches which are there in OS CD for that release. You can install recommended latest patches later
System then reboots or ask you to reboot depending upon the choice selected earlier .
5. After Installation
After rebooting it asks for new root passed and comes to console prompt where you can login as root install patches ,additional software , make user etc. etc.
The idea of this article is to introduce you with the procedure and sequence of event Solaris installation to build enough confidence to finish the installation on your own.
Table of contents
1. Before you begin
2. Getting Started
3. Starting the installation
4. OS distributions & disk configuration
5. After Installation
6. Next Steps
1. Before you begin
For Solaris installation on standalone Sun machine you need the following besides sun cpu :
A) Sun Monitor and Sun Keyboard
OR
For carrying the installation through the serial port A of Sun (ttya)
Dumb Terminal or PC with serial port communication software like HyperTerminal
AND
A null modem cable ( Pin 2 & 3 crossed 5 common ground in 9 Pin to 9 pin ; Pin 7 is common ground in 25 Pin connector ) connecting sun’s serial port A with PC serial port.
B) You will also require a IP address, netmask and a host name for your system.
2. Getting Started
Installation starts at OK> prompt & you can get to ok> using any of the following method :
A. by pressing Stop A key sequence on a Sun Keyboard.
B. typing #init 0 if your system boots up directly .
C. Pressing ctrl-break or shift-break on a pc keyboard if using pc as
console through serial port.
D. If auto-boot feature is enabled system directly boots up
and gives you a # prompt .You can disable auto-boot so next time it
stays at ok prompt for starting installation.
#/usr/platform/sun4u/bin/eeprom auto-boot?=false
reboot the system.
3. Starting the installation
Insert the installation media – OS CD in CD drive and type boot cdrom at ok> prompt .
Ok>boot cdrom
The first phase begins with system identification and gathers information about the system from the the user .System starts booting up and after initialization it asks for language and locale also terminal type in case of PC/terminal
Select your locale and DEC VT100 terminal type for terminal selection
Further installation through the terminal require response to the
selections through ESC and function keys and space bar which are
mentioned on the installation screen.
On the next screens, you are to identify the system as networked or non-networked, and set the default time zone and date/time. After this following host information is required :
A) A host name for the system
B) Whether the system is networked if yes you will have to
provide the IP address & netmask of this machine.
Next you will be asked to select the name services
Name services
[ ] NIS+
[ ] NIS
[ ] DNS
[X ] None
Select the service if you have complete details like domain names etc or select none to configure after installation.
You have to select a distribution type from among the choices choices
4. OS distribution & Disk configuration
After identification is complete the installation process proceeds on to the OS and disk configuration and need your input for these settings. Selection depends on role of your machine
Typical space requirement for Solaris 7 is given here.
[ ] Entire Distribution plus OEM support 64-bit 1242.00 MB (F4 to Customize
[X] Entire Distribution 64-bit .....…...….1215.00 MB
[ ] Developer System Support 64-bit.... 1154.00 MB
[ ] End User System Support 64-bit .….. 765.00 MB
[ ] Core System Support .............. .334.00 MB
* Entire distribution with OEM has all software with some third party software
* Entire distribution has all software without third party software .
* Developer system has run time libraries for C software etc.
* End user has X windows and CDE environment .
* Core system is without X windows softwares etc.
If you are not sure select entire distribution.
You will be presented with choice to select the boot disk among the disks present in the system ,unless you have reasons select the c0t0d0 at boot disk.
[ X ] c0t0d0 (17269 MB) boot disk 17269 MB
[ ] c0t1d0 (17269 MB) 17269 MB
overlap partition represents entire disk and is slice s2 of the disk.
If any of the disk contain a preexisting partition you will be given a choice to preserve the partition .
Next the current layout is given ( if existing ) and you are asked to select between Automatic and Custom layout of disk partitions.
* Automatic layout make a single partition of entire boot disk .
* Customize option gives and option to create the partitions and select the sizes .
Things to keep in mind while doing interactive or custom installation
- Additional space is required in /var & /home if server is to handle mail and printing as mail and print files are formed in /var & if the user home directories are to be located on /home partition
A sample partition table may look like following .
File system/Mount point Disk/Slice Size
---------------------------------------
/ c0t0d0s0 300 MB
swap c0t0d0s1 2000 MB
overlap c0t0d0s2 17269 MB
/usr c0t0d0s3 2000 MB
/opt c0t0d0s4 1000 MB
/var c0t0d0s5 1000 MB
- The swap partition size depends on the size of RAM in the system if you are not sure of its size keep it double the RAM or more than RAM in the system.
- If you are not sure of individual partition sizes of / , /usr /opt & /var make one partition as / and keep its size sufficiently higher than the distribution size you have selected in earlier steps . Always keep in mind the future software that you might have to install like compilers applications etc and log files that will be generated and accumulate in /var directory or partition.
After you have specified the partition sizes it gives summary and error if any
Installation Option: Initial
Boot Device: c0t0d0s0
Client Services: None
Software: Solaris 2.7, Entire Distribution
File System and Disk Layout:
/ c0t0d0s0 300 MB
swap c0t0d0s1 2000 MB
/usr c0t0d0s3 2000 MB
/opt c0t0d0s4 1000 MB
/var c0t0d0s5 1000 MB
one more question is asked about rebooting
[X] Auto Reboot
[ ] Manual Reboot
Afterwards it starts configuring disk making partitions and installing software indicating the progress in a table .
MBytes Installed: 700.66
MBytes Remaining: 0.00
Installing:
| | | | | |
0 20 40 60 80 100
After the installation is complete it customizes system files , devices ,logs , installs patches which are there in OS CD for that release. You can install recommended latest patches later
System then reboots or ask you to reboot depending upon the choice selected earlier .
5. After Installation
After rebooting it asks for new root passed and comes to console prompt where you can login as root install patches ,additional software , make user etc. etc.
Crontab – Quick Reference

Setting up cron jobs in Unix and Solaris
cron is a unix, solaris utility that allows tasks to be automatically run in the background at regular intervals by the cron daemon. These tasks are often termed as cron jobs in unix , solaris. Crontab (CRON TABle) is a file which contains the schedule of cron entries to be run and at specified times.
This document covers following aspects of Unix cron jobs
1. Crontab Restrictions
2. Crontab Commands
3. Crontab file – syntax
4. Crontab Example
5. Crontab Environment
6. Disable Email
7. Generate log file for crontab activity
1. Crontab Restrictions
You can execute crontab if your name appears in the file /usr/lib/cron/cron.allow. If that file does not exist, you can use
crontab if your name does not appear in the file /usr/lib/cron/cron.deny.
If only cron.deny exists and is empty, all users can use crontab. If neither file exists, only the root user can use crontab. The allow/deny files consist of one user name per line.
2. Crontab Commands
export EDITOR=vi ;to specify a editor to open crontab file.
crontab -e Edit your crontab file, or create one if it doesn’t already exist.
crontab -l Display your crontab file.
crontab -r Remove your crontab file.
crontab -v Display the last time you edited your crontab file. (This option is only available on a few systems.)
3. Crontab file
Crontab syntax :
A crontab file has five fields for specifying day , date and time followed by the command to be run at that interval.
* in the value field above means all legal values as in braces for that column.
The value column can have a * or a list of elements separated by commas. An element is either a number in the ranges shown above or two numbers in the range separated by a hyphen (meaning an inclusive range).
Notes
A. ) Repeat pattern like /2 for every 2 minutes or /10 for every 10 minutes is not supported by all operating systems. If you try to use it and crontab complains it is probably not supported.
B.) The specification of days can be made in two fields: month day and weekday. If both are specified in an entry, they are cumulative meaning both of the entries will get executed .
4. Crontab Example
A line in crontab file like below removes the tmp files from /home/someuser/tmp each day at 6:30 PM.
30 18 * * * rm /home/someuser/tmp/*
Changing the parameter values as below will cause this command to run at different time schedule below :
min hour day/month month day/week Execution time
30 0 1 1,6,12 * – 00:30 Hrs on 1st of Jan, June & Dec.
0 20 * 10 1-5 –8.00 PM every weekday (Mon-Fri) only in Oct.
0 0 1,10,15 * * – midnight on 1st ,10th & 15th of month
5,10 0 10 * 1 – At 12.05,12.10 every Monday & on 10th of every month
:
Note : If you inadvertently enter the crontab command with no argument(s), do not attempt to get out with Control-d. This removes all entries in your crontab file. Instead, exit with Control-c.
5. Crontab Environment
cron invokes the command from the user’s HOME directory with the shell, (/usr/bin/sh).
cron supplies a default environment for every shell, defining:
HOME=user’s-home-directory
LOGNAME=user’s-login-id
PATH=/usr/bin:/usr/sbin:.
SHELL=/usr/bin/sh
Users who desire to have their .profile executed must explicitly do so in the crontab entry or in a script called by the entry.
6. Disable Email
By default cron jobs sends a email to the user account executing the cronjob. If this is not needed put the following command At the end of the cron job line .
>/dev/null 2>&1
7. Generate log file
To collect the cron execution execution log in a file :
30 18 * * * rm /home/someuser/tmp/* > /home/someuser/cronlogs/clean_tmp_dir.log
Monday, August 16, 2010

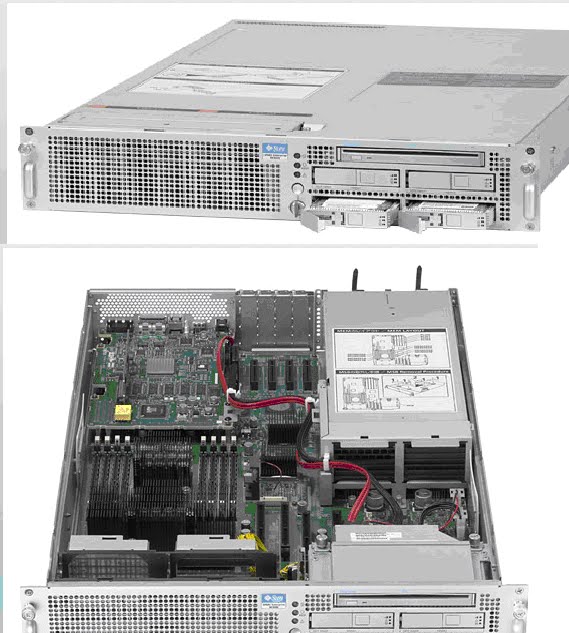

SPARC Enterprise M9000

The ultimate Solaris server. World leading reliability with scalability up to 256 CPU cores and 4 TB memory. This is the system to fully optimize your business processes


Wednesday, July 21, 2010
Understanding UNIX permissions and chmod
Introduction
This is a topic that has been beaten to death both in books and on-line. For some reason, it seems that it is one of the most common misunderstandings that people have to face when learning how to write and/or configure their first cgi programs. This tutorial aims to clarify the concepts involved. Note that we will be referring to UNIX in a generic sense in this article. Most of what we are going to discuss here applies to all UNIX flavours. (such as Linux, SVR4, BSD etc.) It is also a good idea to type man chmod to check for the specific details on your system, too.
Users
A UNIX system serves many users. Users are an abstraction that denotes a logical entity for assignment of ownership and operation privileges over the system. A user may correspond to a real-world person, but also a type of system operation. So, in my system, I have user 'nick' that corresponds to me, but I also have user 'www' which corresponds to the privileges necessary to operate the local webserver. UNIX doesn't care about what the user means for me. It just knows what belongs to any given user and what each user is allowed to do with any given thing (file, program, device, etc) on the system. UNIX identifies each user by a User ID (UID) and the username (or login) such as 'nick' and 'www' is just an alias to the UID that makes humans more comfortable.
Groups
Users can be organized in groups. A user may belong to one or more groups of users. The concept of groups serves the purpose of assigning sets of privileges for a given resource and sharing them among many users that need to have them. (perhaps because they are all members of a project working team and they all need access to some common project files) So, on my system user 'nick' and user 'www' both belong to the group 'perlfect'. This way, they can have some shared privileges over the files for this site. User 'nick' needs them to edit the site, and user 'www' needs them to manage the webserver that will be publishing the site.
Ownership
Every file in UNIX has an owner user and an owner group. So, for any file in the system, user 'nick' may have one of the following ownership relations:
nick owns the file, i.e. the file's owner is 'nick'.
nick is a member of the group that owns the file, i.e. the file's owner group is 'perlfect'.
nick is neither the owner, nor belonging to the group that owns the file
Permissions
Every file on the system has associated with it a set of permissions. Permissions tell UNIX what can be done with that file and by whom. There are three things you can (or can't) do with a given file:
read it,
write (modify) it and
execute it.
Unix permissions specify which of the above operations can be performed for any ownership relation with respect to the file. In simpler terms, what can the owner do, what can the owner group do, and what can everybody else do with the file. For any given ownership relation, we need three bits to specify access permissions: the first to denote read (r) access, the second to denote (w) access and the third to denote execute (x) access. We have three ownership relations: 'owner', 'group' and 'all' so we need a triplet for each, resulting in nine bits. Each bit can be set or clear. (not set) We mark a set bit by it's corresponding operation letter (r, w or x) and a clear bit by a dash (-) and put them all on a row. An example might be rwxr-xr-x.What this means is that the owner can do anything with the file, but group owners and the rest of the world can only read or execute it. Usually in UNIX there is also another bit that precedes this 9-bit pattern. You do not need to know about it, at least for the time being.
So if you try ls -l on the command prompt you will get something like the following:
[nick@thekla src]$ ls -l
-rwxr-xr-x 1 nick users 382 Jan 19 11:49 bscoped.pl
drwxr-xr-x 3 nick users 1024 Jan 19 11:19 lib/
-rwxr-xr-x 1 nick users 1874 Jan 19 10:23 socktest.pl
The first column here shows the permission bit pattern for each file. The third column shows the owner, and the fourth column shows the owner group. By the time, the information provided by ls -l should be enough for you to figure out what each user of the system can do with any of the files in the directory.
Directories
Another interesting thing to note is that lib/ which is a directory has permissions, too. Permissions take a different meaning for directories. Here's what they mean:
read determines if a user can view the directory's contents, i.e. do ls in it.
write determines if a user can create new files or delete file in the directory. (Note here that this essentially means that a user with write access toa directory can delete files in the directory even if he/she doesn't have write permissions for the file! So be careful with this.)
execute determines if the user can cd into the directory.
chmod
To set/modify a file's permissions you need to use the chmod program. Of course, only the owner of a file may use chmod to alter a file's permissions. chmod has the following syntax: chmod [options] mode file(s)
The 'mode' part specifies the new permissions for the file(s) that follow as arguments. A mode specifies which user's permissions should be changed, and afterwards which access types should be changed. Let's say for example:
chmod a-x socktest.pl This means that the execute bit should be cleared (-) for all users. (owner, group and the rest of the world) The permissions start with a letter specifying what users should be affected by the change, this might be any of the following:
u the owner user
g the owner group
o others (neither u, nor g)
a all users
This is followed by a change instruction which consists of a +(set bit) or -(clear bit) and the letter corresponding to the bit that should be changed.
Let's see some examples:
$ ls -l socktest.pl
-rwxr-xr-x 1 nick users 1874 Jan 19 10:23 socktest.pl*
$ chmod a-x socktest.pl
$ ls -l socktest.pl
-rw-r--r-- 1 nick users 1874 Jan 19 10:23 socktest.pl
$ chmod g+w socktest.pl
$ ls -l socktest.pl
-rw-rw-r-- 1 nick users 1874 Jan 19 10:23 socktest.pl
$ chmod ug+x socktest.pl
$ ls -l socktest.pl
-rwxrwxr-- 1 nick users 1874 Jan 19 10:23 socktest.pl*
$ chmod ug-wx socktest.pl
$ ls -l socktest.pl
-r--r--r-- 1 nick users 1874 Jan 19 10:23 socktest.pl
Strange numbers...
You might have encountered things like chmod 755 somefile and of course you will be wondering what this is. The thing is, that you can change the entire permission pattern of a file in one go using one number like the one in this example. Every mode has a corresponding code number, and as we shall see there is a very simple way to figure out what number corresponds to any mode.
Every one of the three digits on the mode number corresponds to one of the three permission triplets. (u, g and o) Every permission bit in a triplet corresponds to a value: 4 for r, 2 for w, 1 for x. If the permission bit you add this value to the number of the permission triplet. If it is cleared, then you add nothing. (Some of you might notice that in fact, the number for a triplet is the octal value corresponding to the three-bit pattern - if you don't know what an octal value is, it doesn't really matter, just follow the intstructions) So if a file has rwxr-xr-x permissions we do the following calculation:
Triplet for u: rwx => 4 + 2 + 1 = 7
Triplet for g: r-x => 4 + 0 + 1 = 5
Tripler for o: r-x => 4 + 0 + 1 = 5
Which makes : 755
So, 755 is a terse way to say 'I don't mind if other people read or run this file, but only I should be able to modify it' and 777 means 'everyone has full access to this file'
This is a topic that has been beaten to death both in books and on-line. For some reason, it seems that it is one of the most common misunderstandings that people have to face when learning how to write and/or configure their first cgi programs. This tutorial aims to clarify the concepts involved. Note that we will be referring to UNIX in a generic sense in this article. Most of what we are going to discuss here applies to all UNIX flavours. (such as Linux, SVR4, BSD etc.) It is also a good idea to type man chmod to check for the specific details on your system, too.
Users
A UNIX system serves many users. Users are an abstraction that denotes a logical entity for assignment of ownership and operation privileges over the system. A user may correspond to a real-world person, but also a type of system operation. So, in my system, I have user 'nick' that corresponds to me, but I also have user 'www' which corresponds to the privileges necessary to operate the local webserver. UNIX doesn't care about what the user means for me. It just knows what belongs to any given user and what each user is allowed to do with any given thing (file, program, device, etc) on the system. UNIX identifies each user by a User ID (UID) and the username (or login) such as 'nick' and 'www' is just an alias to the UID that makes humans more comfortable.
Groups
Users can be organized in groups. A user may belong to one or more groups of users. The concept of groups serves the purpose of assigning sets of privileges for a given resource and sharing them among many users that need to have them. (perhaps because they are all members of a project working team and they all need access to some common project files) So, on my system user 'nick' and user 'www' both belong to the group 'perlfect'. This way, they can have some shared privileges over the files for this site. User 'nick' needs them to edit the site, and user 'www' needs them to manage the webserver that will be publishing the site.
Ownership
Every file in UNIX has an owner user and an owner group. So, for any file in the system, user 'nick' may have one of the following ownership relations:
nick owns the file, i.e. the file's owner is 'nick'.
nick is a member of the group that owns the file, i.e. the file's owner group is 'perlfect'.
nick is neither the owner, nor belonging to the group that owns the file
Permissions
Every file on the system has associated with it a set of permissions. Permissions tell UNIX what can be done with that file and by whom. There are three things you can (or can't) do with a given file:
read it,
write (modify) it and
execute it.
Unix permissions specify which of the above operations can be performed for any ownership relation with respect to the file. In simpler terms, what can the owner do, what can the owner group do, and what can everybody else do with the file. For any given ownership relation, we need three bits to specify access permissions: the first to denote read (r) access, the second to denote (w) access and the third to denote execute (x) access. We have three ownership relations: 'owner', 'group' and 'all' so we need a triplet for each, resulting in nine bits. Each bit can be set or clear. (not set) We mark a set bit by it's corresponding operation letter (r, w or x) and a clear bit by a dash (-) and put them all on a row. An example might be rwxr-xr-x.What this means is that the owner can do anything with the file, but group owners and the rest of the world can only read or execute it. Usually in UNIX there is also another bit that precedes this 9-bit pattern. You do not need to know about it, at least for the time being.
So if you try ls -l on the command prompt you will get something like the following:
[nick@thekla src]$ ls -l
-rwxr-xr-x 1 nick users 382 Jan 19 11:49 bscoped.pl
drwxr-xr-x 3 nick users 1024 Jan 19 11:19 lib/
-rwxr-xr-x 1 nick users 1874 Jan 19 10:23 socktest.pl
The first column here shows the permission bit pattern for each file. The third column shows the owner, and the fourth column shows the owner group. By the time, the information provided by ls -l should be enough for you to figure out what each user of the system can do with any of the files in the directory.
Directories
Another interesting thing to note is that lib/ which is a directory has permissions, too. Permissions take a different meaning for directories. Here's what they mean:
read determines if a user can view the directory's contents, i.e. do ls in it.
write determines if a user can create new files or delete file in the directory. (Note here that this essentially means that a user with write access toa directory can delete files in the directory even if he/she doesn't have write permissions for the file! So be careful with this.)
execute determines if the user can cd into the directory.
chmod
To set/modify a file's permissions you need to use the chmod program. Of course, only the owner of a file may use chmod to alter a file's permissions. chmod has the following syntax: chmod [options] mode file(s)
The 'mode' part specifies the new permissions for the file(s) that follow as arguments. A mode specifies which user's permissions should be changed, and afterwards which access types should be changed. Let's say for example:
chmod a-x socktest.pl This means that the execute bit should be cleared (-) for all users. (owner, group and the rest of the world) The permissions start with a letter specifying what users should be affected by the change, this might be any of the following:
u the owner user
g the owner group
o others (neither u, nor g)
a all users
This is followed by a change instruction which consists of a +(set bit) or -(clear bit) and the letter corresponding to the bit that should be changed.
Let's see some examples:
$ ls -l socktest.pl
-rwxr-xr-x 1 nick users 1874 Jan 19 10:23 socktest.pl*
$ chmod a-x socktest.pl
$ ls -l socktest.pl
-rw-r--r-- 1 nick users 1874 Jan 19 10:23 socktest.pl
$ chmod g+w socktest.pl
$ ls -l socktest.pl
-rw-rw-r-- 1 nick users 1874 Jan 19 10:23 socktest.pl
$ chmod ug+x socktest.pl
$ ls -l socktest.pl
-rwxrwxr-- 1 nick users 1874 Jan 19 10:23 socktest.pl*
$ chmod ug-wx socktest.pl
$ ls -l socktest.pl
-r--r--r-- 1 nick users 1874 Jan 19 10:23 socktest.pl
Strange numbers...
You might have encountered things like chmod 755 somefile and of course you will be wondering what this is. The thing is, that you can change the entire permission pattern of a file in one go using one number like the one in this example. Every mode has a corresponding code number, and as we shall see there is a very simple way to figure out what number corresponds to any mode.
Every one of the three digits on the mode number corresponds to one of the three permission triplets. (u, g and o) Every permission bit in a triplet corresponds to a value: 4 for r, 2 for w, 1 for x. If the permission bit you add this value to the number of the permission triplet. If it is cleared, then you add nothing. (Some of you might notice that in fact, the number for a triplet is the octal value corresponding to the three-bit pattern - if you don't know what an octal value is, it doesn't really matter, just follow the intstructions) So if a file has rwxr-xr-x permissions we do the following calculation:
Triplet for u: rwx => 4 + 2 + 1 = 7
Triplet for g: r-x => 4 + 0 + 1 = 5
Tripler for o: r-x => 4 + 0 + 1 = 5
Which makes : 755
So, 755 is a terse way to say 'I don't mind if other people read or run this file, but only I should be able to modify it' and 777 means 'everyone has full access to this file'
Subscribe to:
Posts (Atom)